This tutorial teaches you to integrate Sendbird's Chat UIKit for Jetpack Compose in your Android application.
This is what your app will look like when you've finished this tutorial:
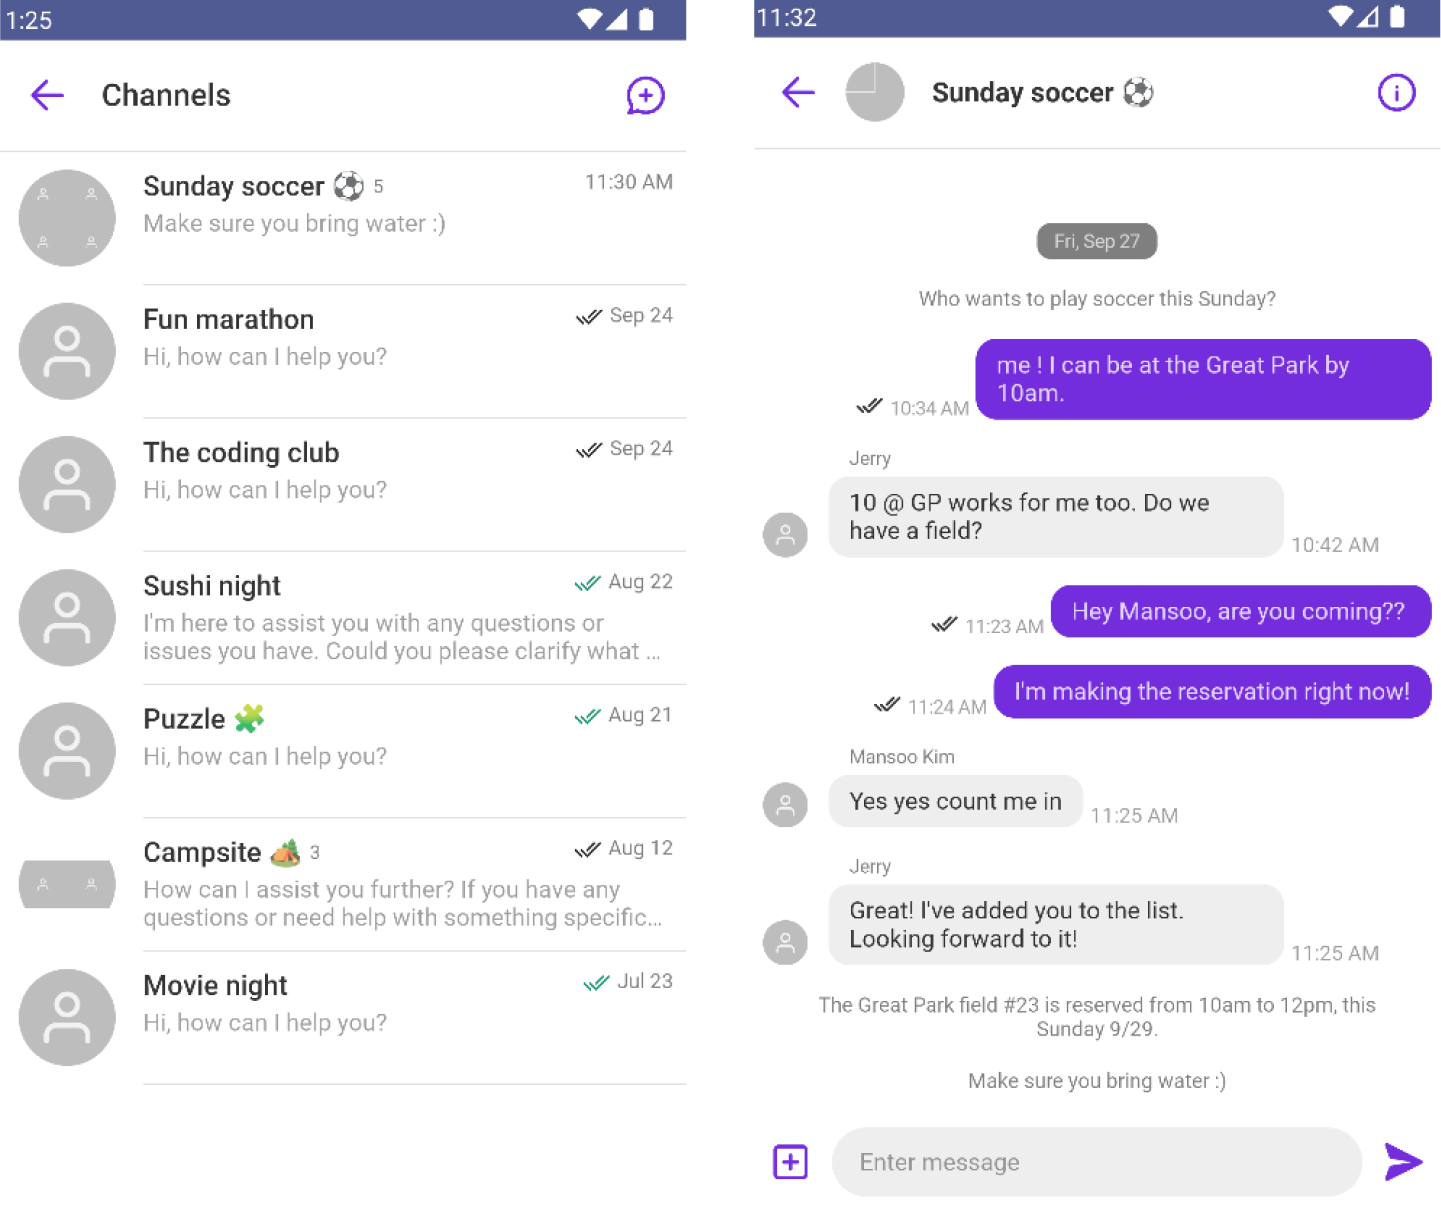
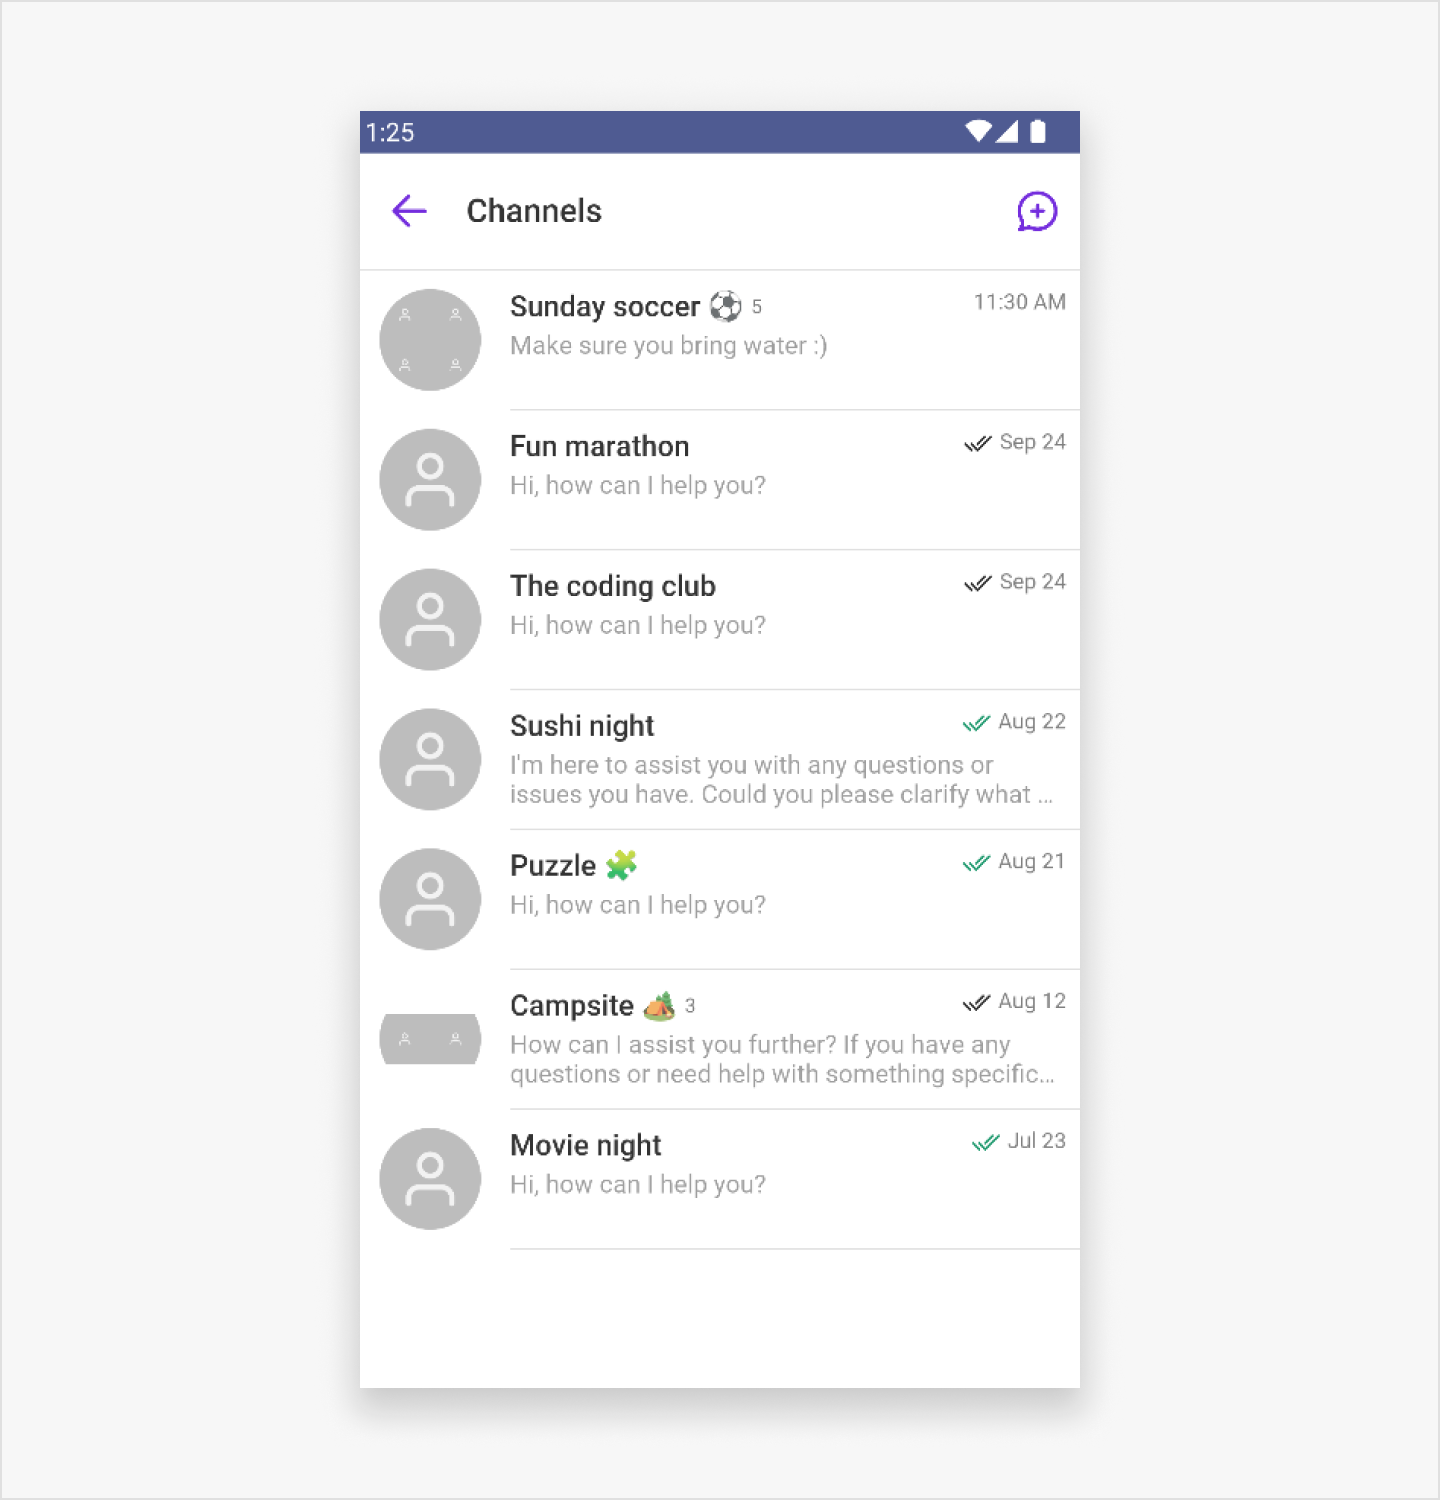
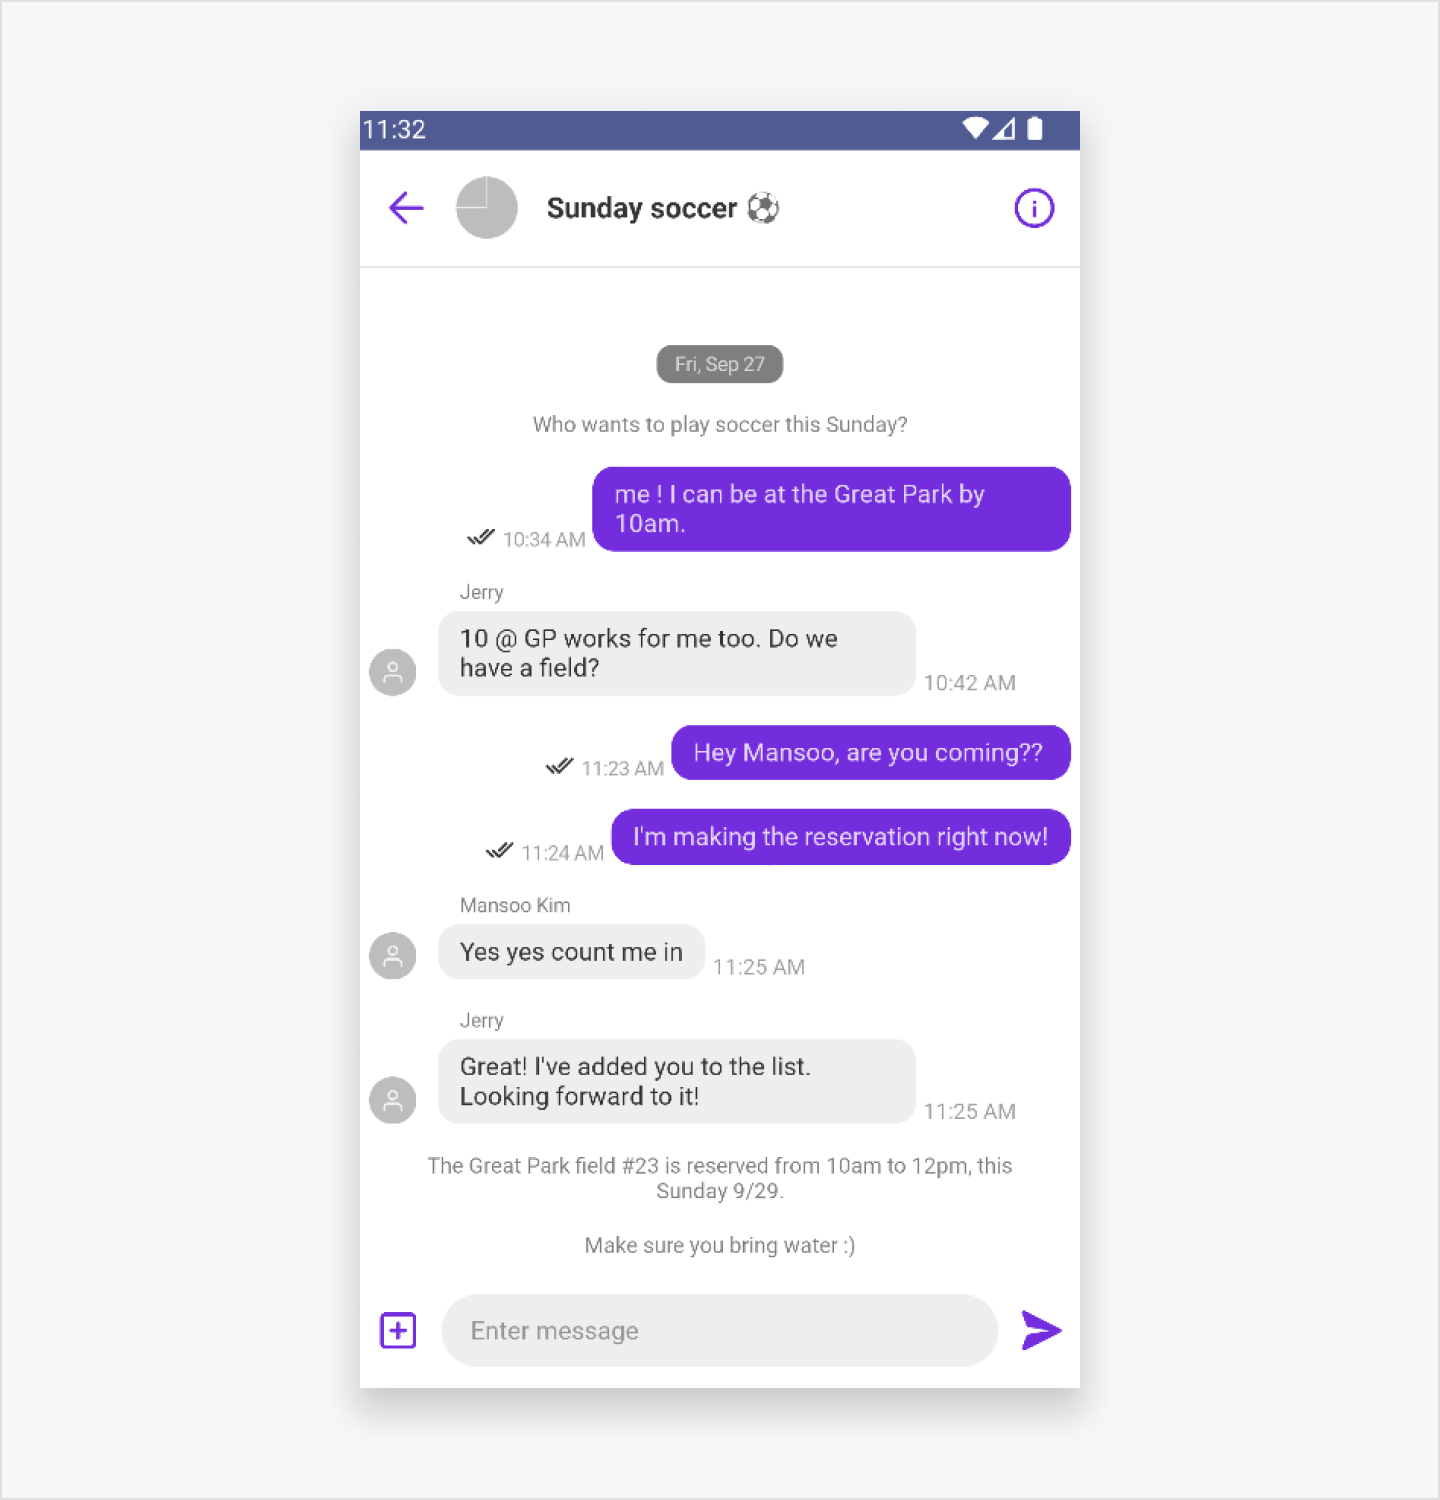
Left: channel list view. Right: channel view.
What You'll Learn
- How to create a project and install UIKit
- How to initialize UIKit in your application
- How to display channel list view
- How to display channel view
Before you start, you need the following:
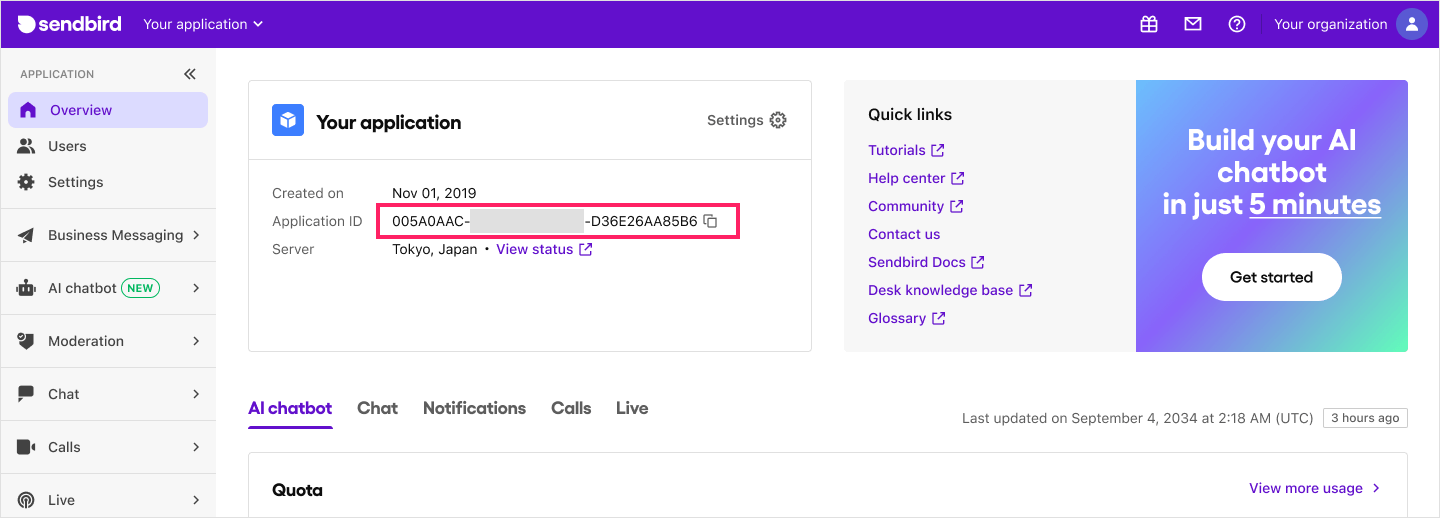
Application ID
- Go to Sendbird Dashboard and create an account or sign in.
- Click Create + to create a new application.
- Enter a name, choose a Product Type and Region, then click Confirm.
- Note down the Application ID - you'll need this later.
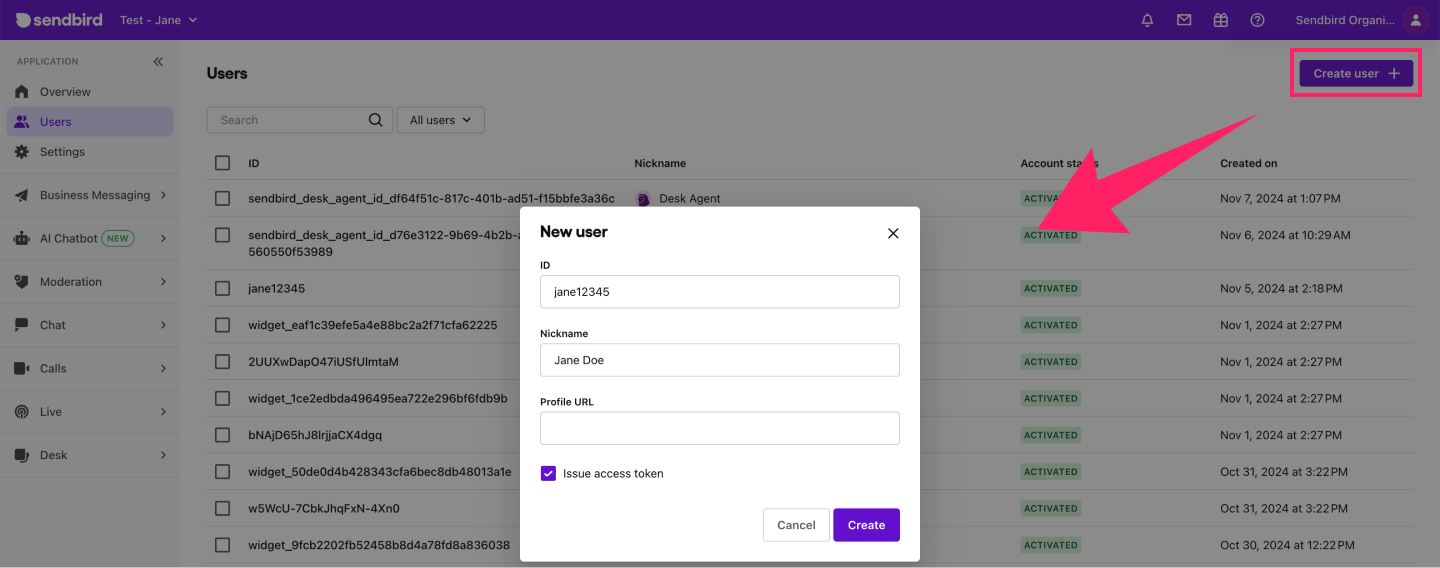
User ID
Next, create a user in your Sendbird application:
- Go to the Users menu and click Create user+.
- Enter a User ID and Nickname. Check Issue access token for authentication.
- Click Create and copy the user ID for later use.
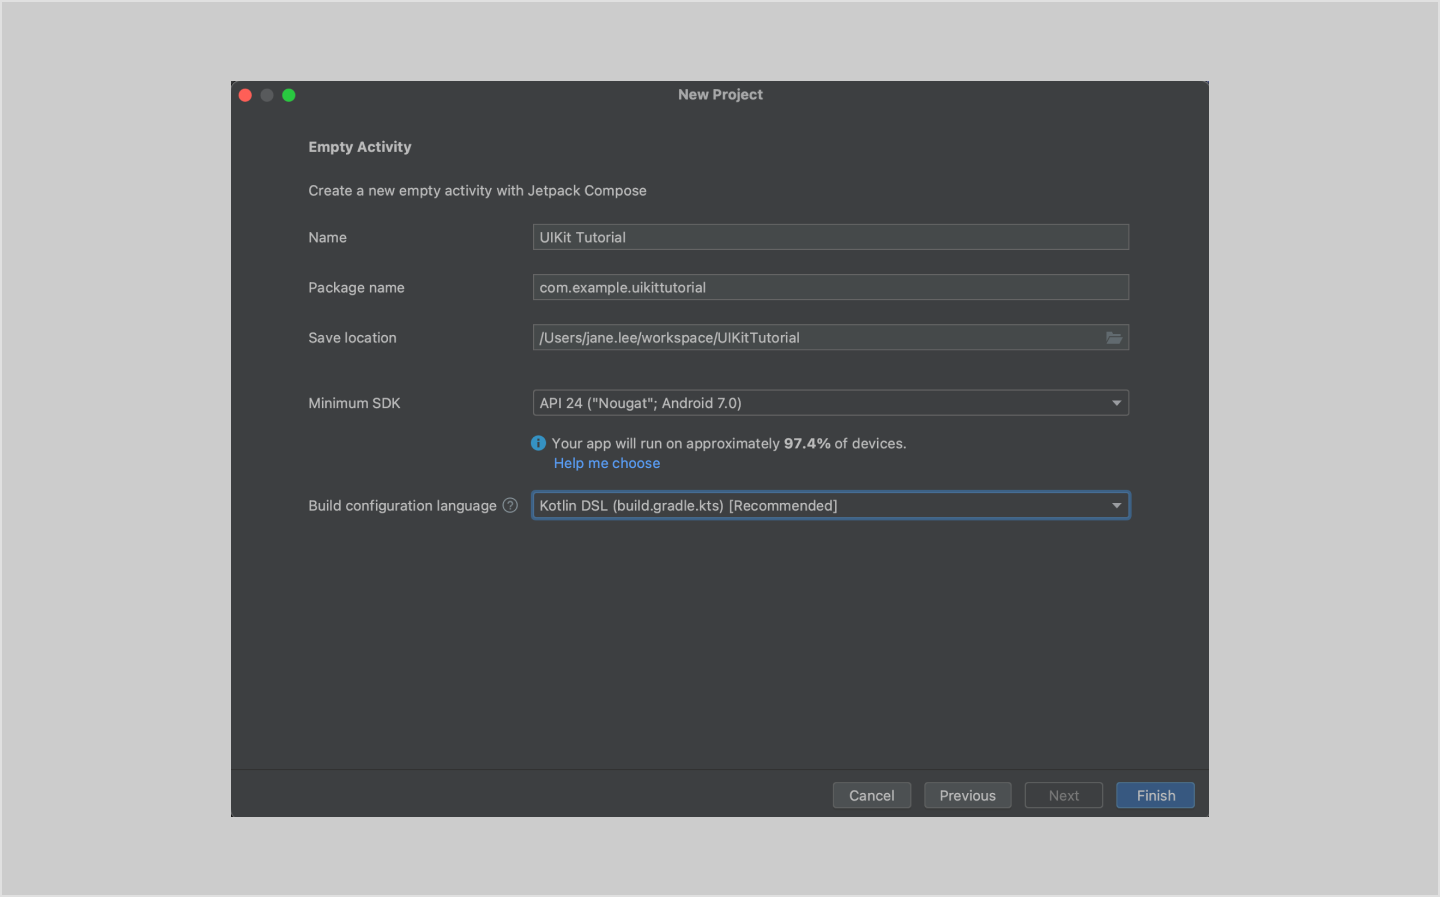
- In Android Studio, create a new project (File > New > New Project...).
- Select Empty Compose Activity and click Next.
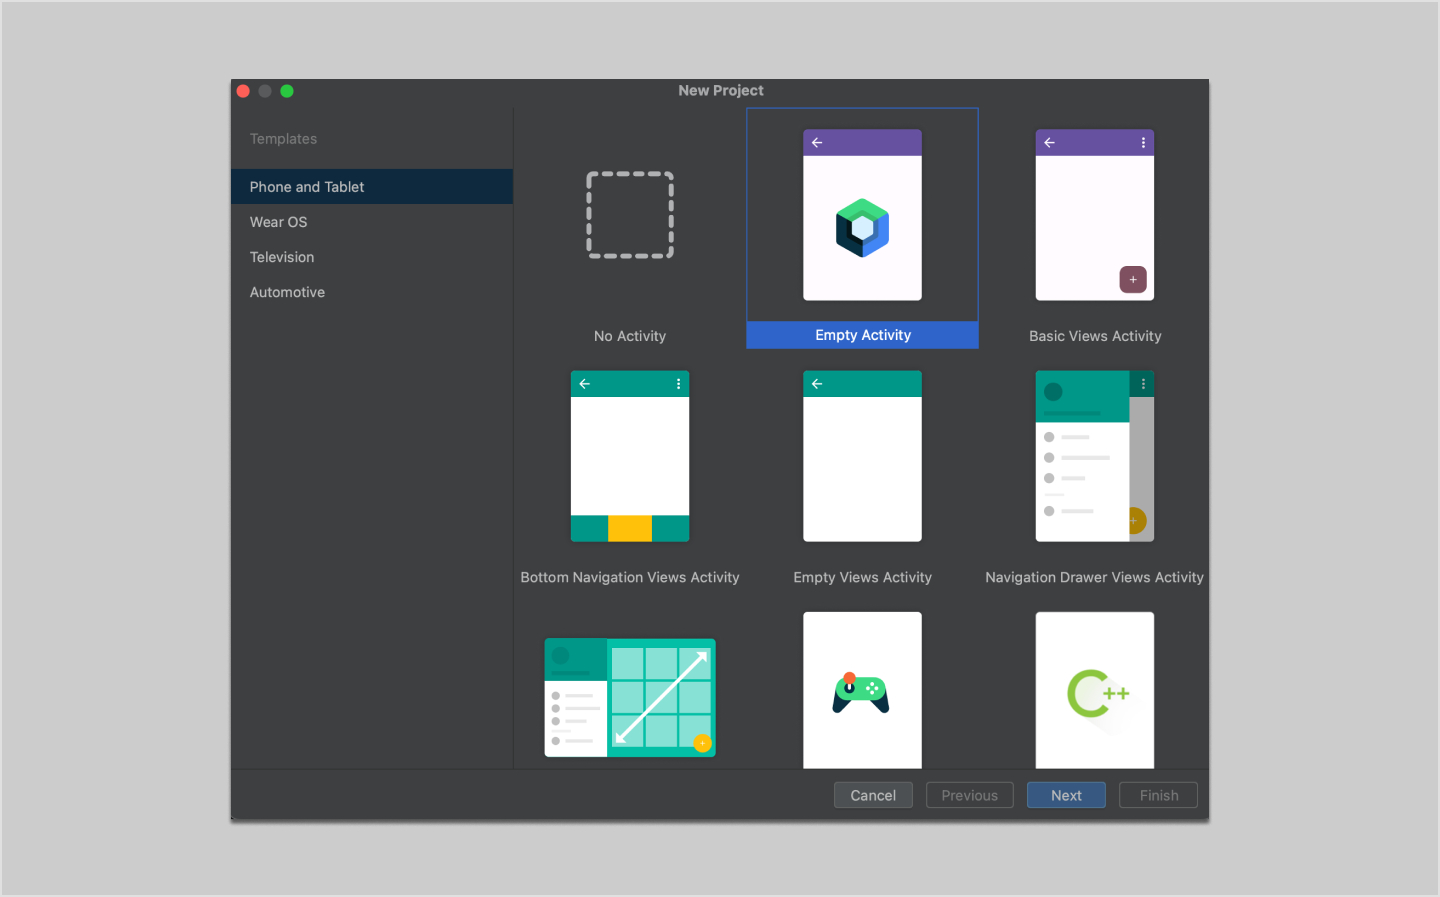
- Give your project a name. Accept all other defaults, including the language as
Kotlinand the minimum SDK asAPI 24: Android 7.0 (Nougat)and click Finish.
Install UIKit for Jetpack Compose using Gradle by following the steps below.
4.1 Configuring the repository
Add the following to your settings.gradle.kts (Project Settings) file:
dependencyResolutionManagement {
    repositories {
        maven { setUrl("https://repo.sendbird.com/public/maven") }
    }
}
Note: You should be using Gradle 6.8 or higher. You can check the gradle-wrapper.properties file in your project to see the version of Gradle you are using.
4.2 Adding the Dependency
Add the dependency to your build.gradle.kts (Module) file:
dependencies {
    implementation("com.sendbird.sdk:uikit-compose:1.0.0")
}
Then, click the Sync button to apply all changes.
To properly integrate and initialize Sendbird UIKit for Jetpack Compose in your Android project, follow these steps to create and set up the BaseApplication.kt file.
5.1 Create the BaseApplication.kt file
- Open Android Studio and navigate to your project.
- In the left side bar, locate the app module.
- Right-click on the java or kotlin folder (depending on what language your project is primarily using).
- Select New > Kotlin File/Class.
- In the dialog that appears, select Class and name it
BaseApplication. - Then, add the following code to your BaseApplication.kt file:
package com.example.uikittutorial

import android.app.Application
import com.sendbird.uikit.compose.SendbirdUikitCompose
import com.sendbird.uikit.core.data.model.UikitCurrentUserInfo
import com.sendbird.uikit.core.data.model.UikitInitParams
import kotlinx.coroutines.MainScope
import kotlinx.coroutines.flow.launchIn

const val AppId = "YOUR_APP_ID"
const val UserId = "YOUR_USER_ID"

class BaseApplication : Application() {
    override fun onCreate() {
        super.onCreate()
        // Initialize Sendbird UIKit Compose.
        SendbirdUikitCompose.init(
            UikitInitParams(
                appId = AppId,
                context = this,
                isForeground = true
            )
        ).launchIn(MainScope())

        // Prepare user information.
        SendbirdUikitCompose.prepare(
            UikitCurrentUserInfo(
                userId = UserId,
                authToken = "USER_ACCESS_TOKEN"
            )
        )
    }
}
Note: You can find the user's Access token in the Sendbird Dashboard under your Application > Users > your user > Access token. For this tutorial, you are using the user access token as a way of authentication. For actual implementation, it is highly recommended to refer to this authentication guide to implement a more secure way of authentication.
5.2 Add the BaseApplication class
To ensure that your BaseApplication class is used as the application class, you need to register it in the AndroidManifest.xml file.
<application
    android:name=".BaseApplication"
>
</application>
To start with the Channel List as the starting screen, declare it as follows in your MainActivity:
Note: If your app doesn't require a Channel List View, you can skip this step and go on to step 7: Display Channel view.
package com.example.uikittutorial

import android.os.Bundle
import androidx.activity.ComponentActivity
import androidx.activity.compose.setContent
import androidx.compose.runtime.Composable
import androidx.navigation.compose.NavHost
import androidx.navigation.compose.rememberNavController
import com.example.uikittutorial.ui.theme.UIKitTutorialTheme
import com.sendbird.uikit.compose.navigation.SendbirdNavigation
import com.sendbird.uikit.compose.navigation.sendbirdGroupChannelNavGraph

class MainActivity : ComponentActivity() {
    override fun onCreate(savedInstanceState: Bundle?) {
        super.onCreate(savedInstanceState)
        setContent {
            UIKitTutorialTheme {
                SendbirdUikitApp()
            }
        }
    }
}

@Composable
fun SendbirdUikitApp() {
    val navController = rememberNavController()
    NavHost(
        navController = navController,
        startDestination = SendbirdNavigation.GroupChannel.route
    ) {
        sendbirdGroupChannelNavGraph(navController = navController)
    }
}
Press the Run app button to launch the app on the emulator in AndroidStudio. The list of channels associated with the indicated user will be displayed as the starting screen, as shown below.
To directly display the channel view, set the startDestination to SendbirdNavigationRoute.Channel. This bypasses the channel list view and takes you straight to the channel view. You must pass the channelUrl as a required parameter, which can be obtained on the Sendbird Dashboard under your Application > Moderation > Channel Moderation > your channel.
const val CHANNEL_URL = "YOUR CHANNEL_URL"

@Composable
fun SendbirdUikitApp() {
    val navController = rememberNavController()
    NavHost(
        navController = navController,
        startDestination = SendbirdNavigation.GroupChannel.route
    ) {
        sendbirdGroupChannelNavGraph(
            navController = navController,
            startDestination = SendbirdNavigationRoute.Channel(channelUrl = CHANNEL_URL)
        )
    }
}
Press the Run app button to launch the app on the emulator in AndroidStudio. The app will start from the ChannelScreen as shown below.
You've successfully integrated Sendbird's UIKit for Jetpack Compose in your Android application. You've learned how to:
- Set up a project and install UIKit
- Initialize UIKit in your application
- Display channel list view and channel view
You can customize the UIKit to match your app's design.
- Check out the list of group channel screens provided by the Sendbird UIKit for Jetpack Compose.
- See how you can customize these views in our customization Docs.
- For a variety of additional code samples, check out our sample app.